How to create a Threat Emulation
Last updated: October 15, 2026
A Threat Emulation groups one or more assets and tests them as a single unit. Creating one takes two steps: first you define the scope (what gets tested) and then the configuration (how and when it gets tested).
Step 1: Create the Threat Emulation
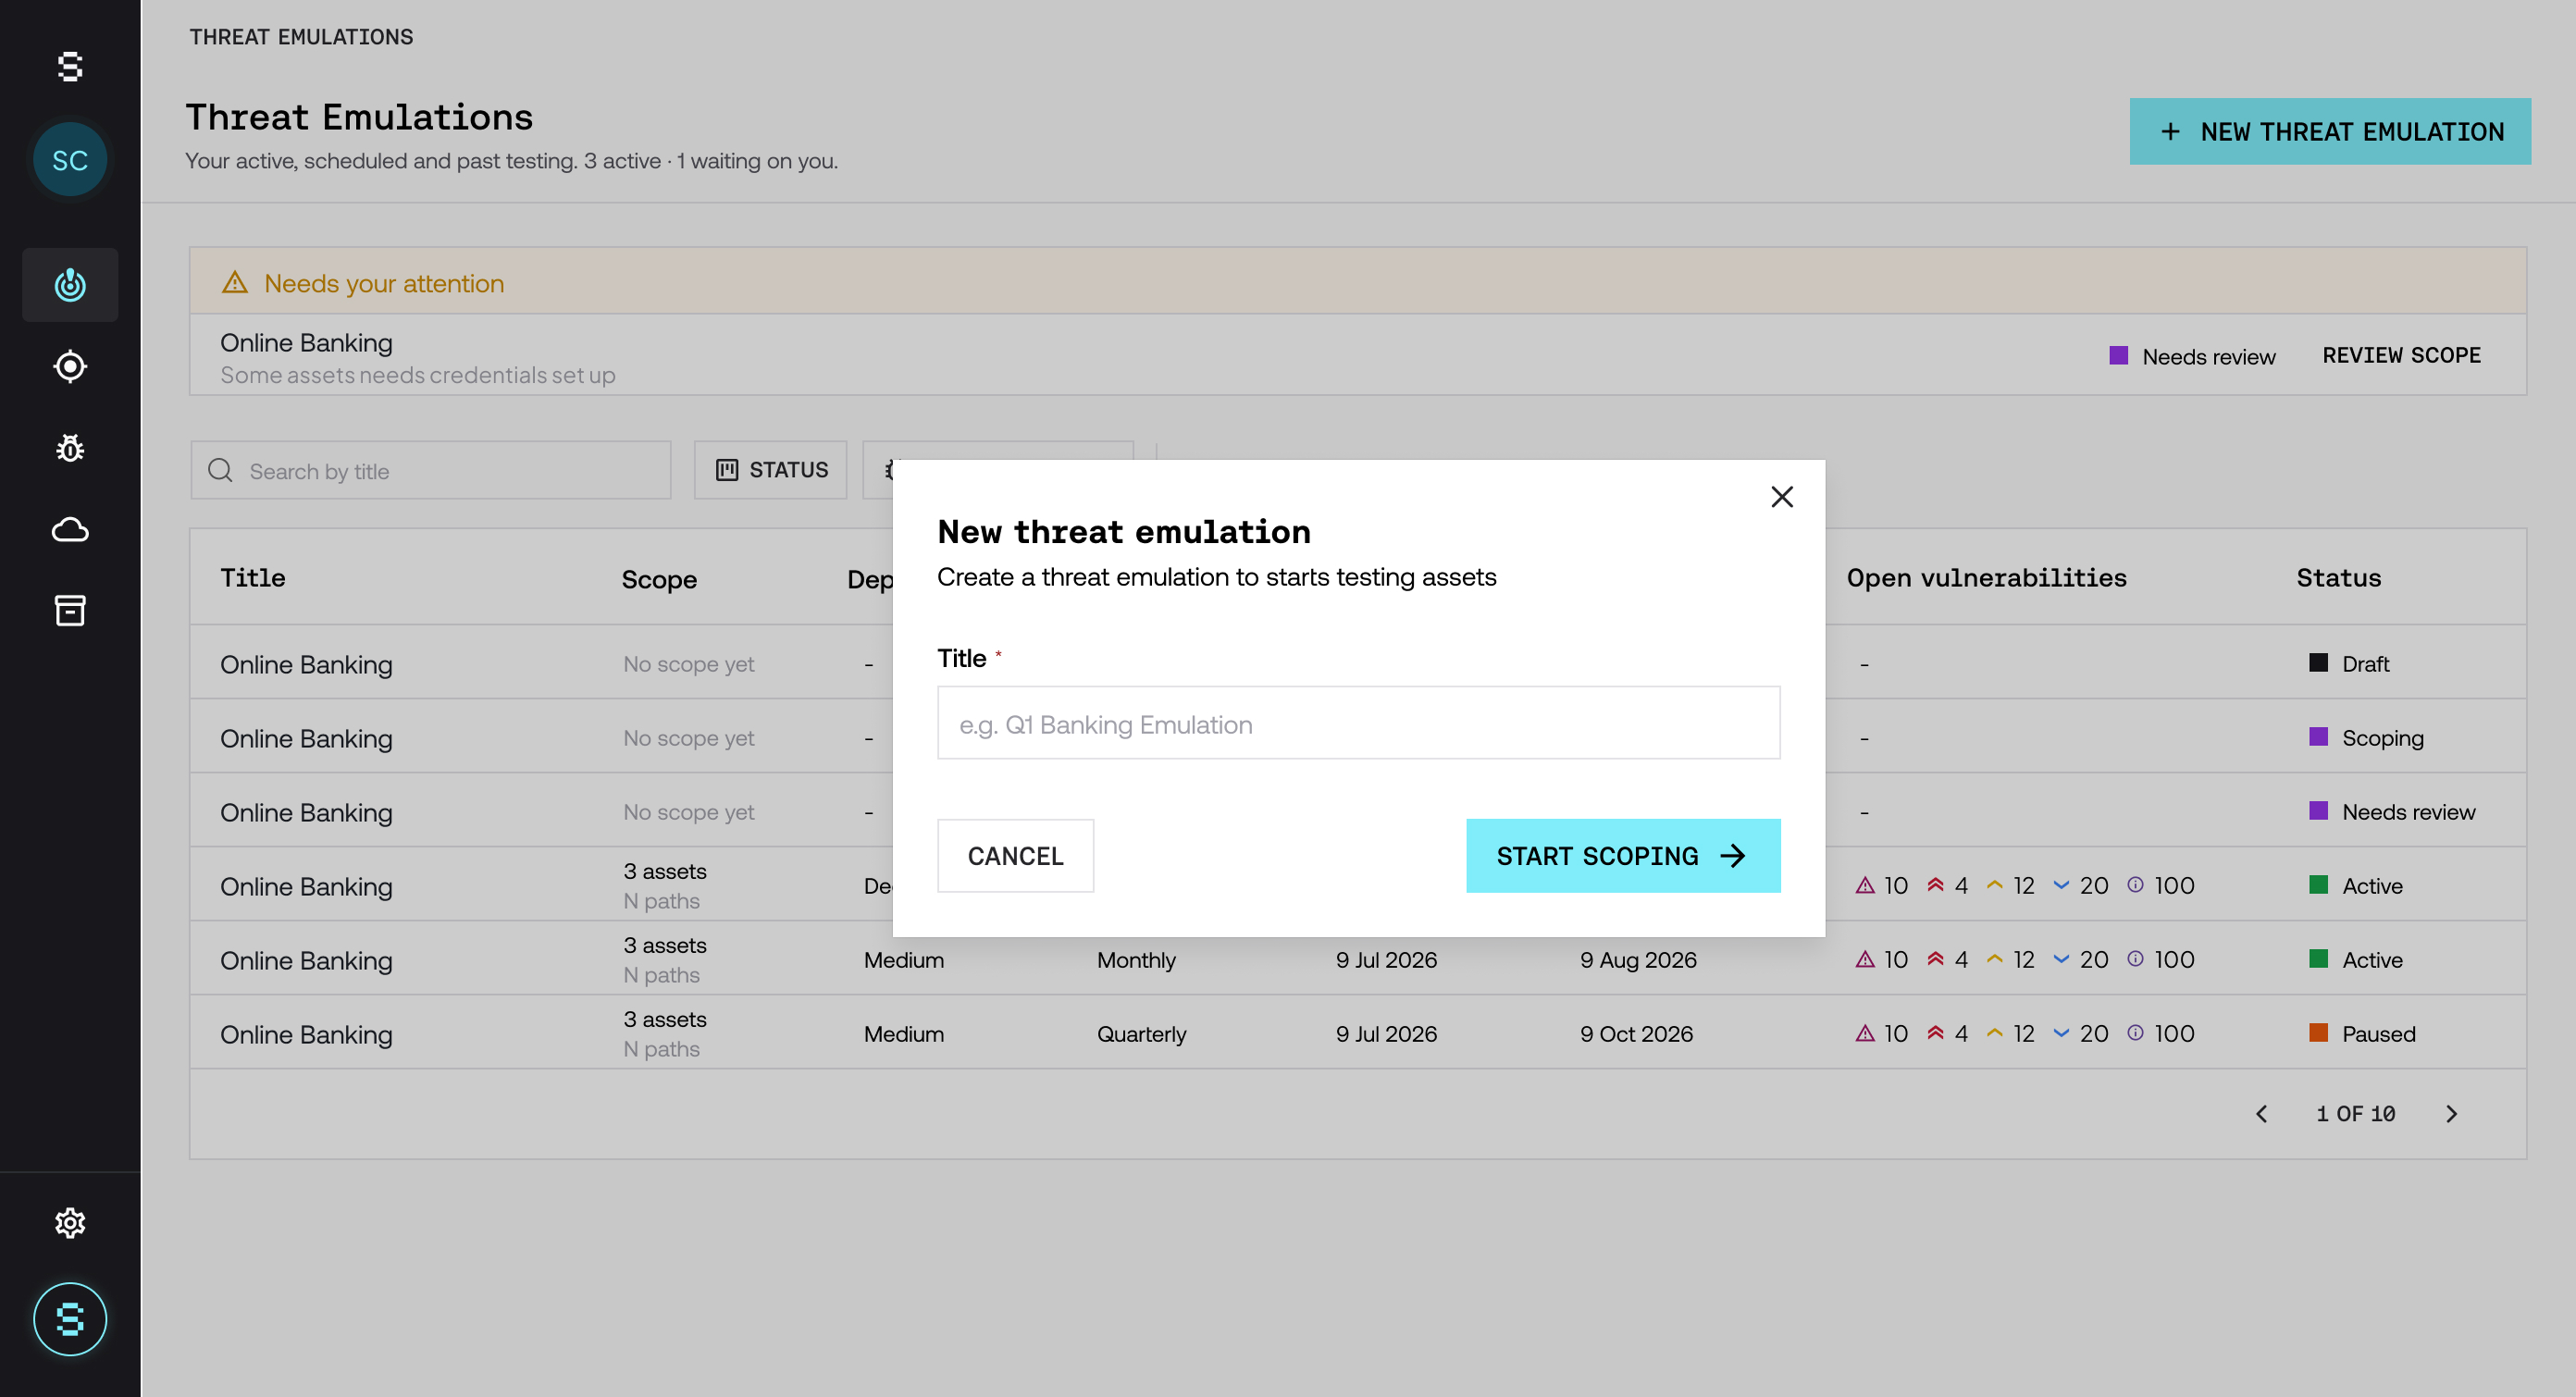
Go to Threat Emulations in the sidebar.
Click + New threat emulation. If you don't have any yet, click + Create threat emulation.
Enter a title in Title. Use a name that makes sense for your business, for example "Home banking" or "Payment flow".
Click Start scoping.
You can change the title later: hover over the title and click the edit icon.
Step 2: Define the scope
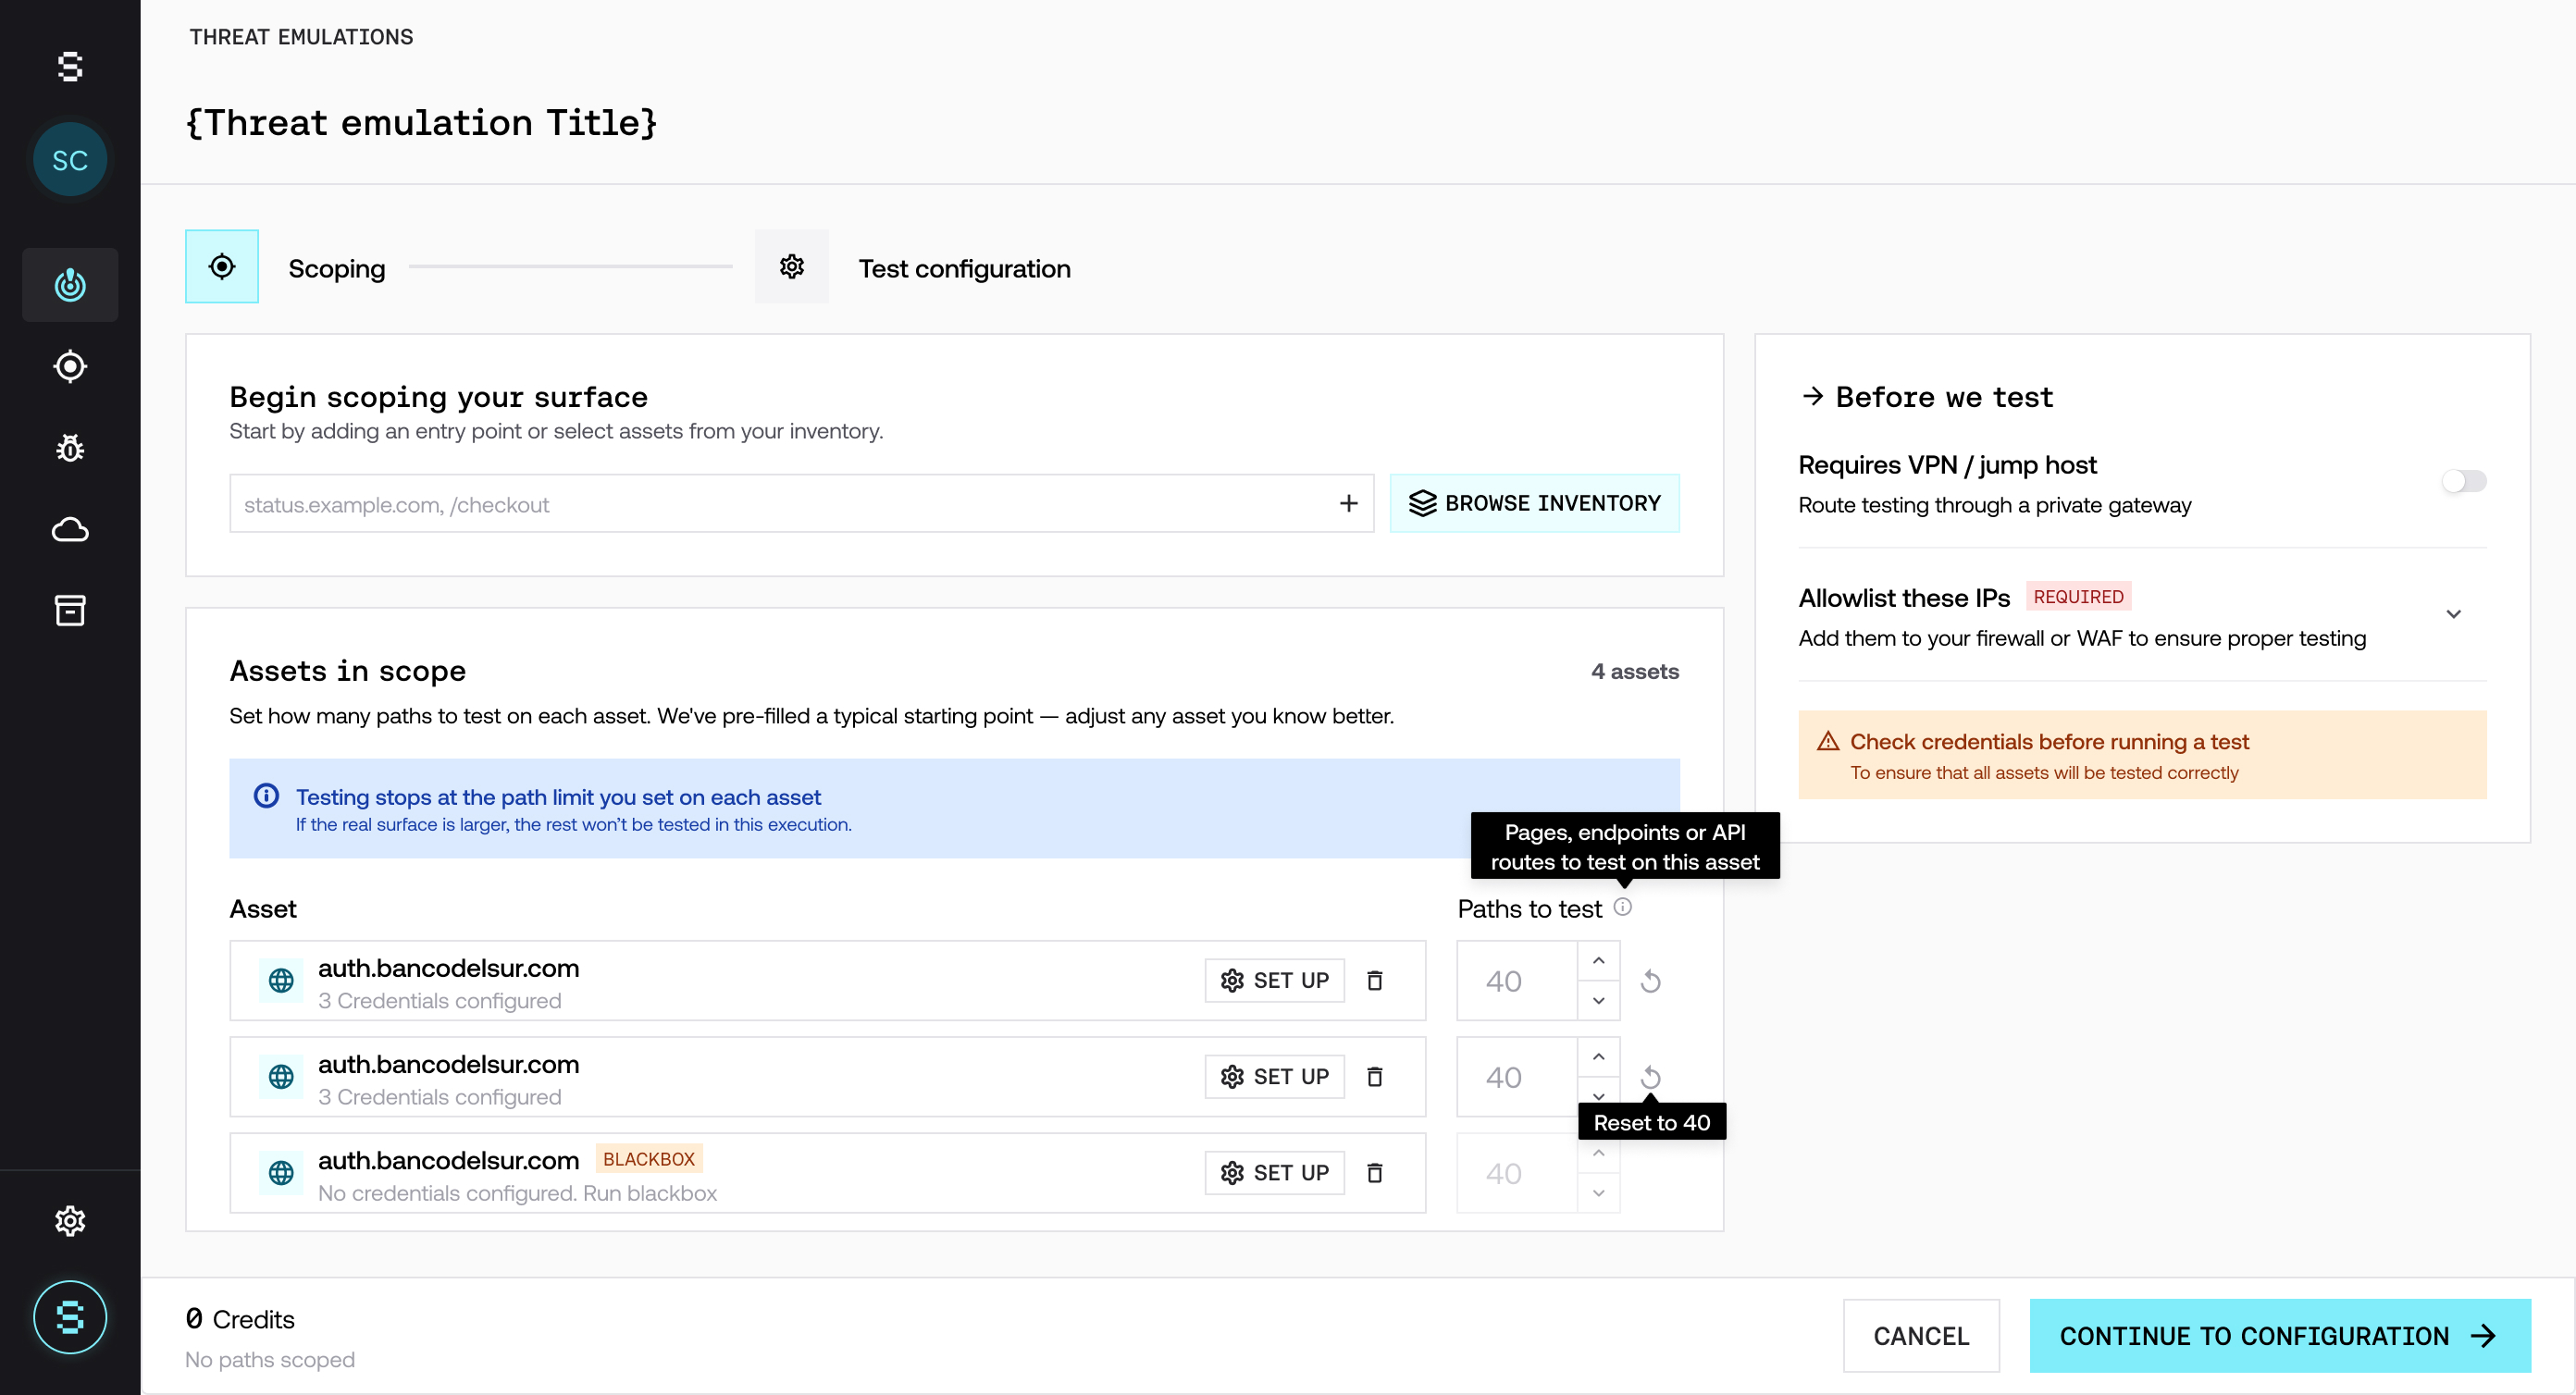
In the Scoping step you choose which assets to include in the Threat Emulation. You can combine new assets and assets you already have in your inventory.
Add a new asset: enter an entry point (a domain or a path, for example
status.example.comor/checkout) and click +.Add assets from your inventory: click Browse inventory and select the assets you want to include.
Paths to test per asset
For each asset you define how many paths to test in Paths to test. A path is a page, endpoint, or API route of the asset.
The default value is 40 paths.
If the asset has credentials configured, you can adjust the value. The minimum is 5.
If the asset has no credentials (blackbox mode), the value is fixed at 40.
Testing stops when it reaches the path limit you defined for each asset. If the actual surface is larger, the rest is not tested in that execution.
The number of paths impacts credit consumption. For more detail, see Credits: what they are and how they are consumed.
Credentials
To configure credentials for an asset, click Set up in the asset's row. With credentials, Strike's AI agent can also test what is behind the login.
If at least one asset has no credentials, the platform shows a notice before you continue. You can choose Add credentials to add them or Keep testing in blackbox to continue without them. In blackbox mode, only what is publicly accessible is tested.
Before testing
In the Before we test panel, review two things:
Requires VPN / jump host: turn it on if your assets are on a private network. Choose the protocol type and upload the configuration file. For more detail, see Accessing your internal network through a VPN.
Allowlist these IPs: add Strike's IPs to your firewall or WAF so that testing works correctly. For more detail, see How to allowlist Strike's IPs.
When you are done, click Continue to configuration.
Step 3: Configure the testing
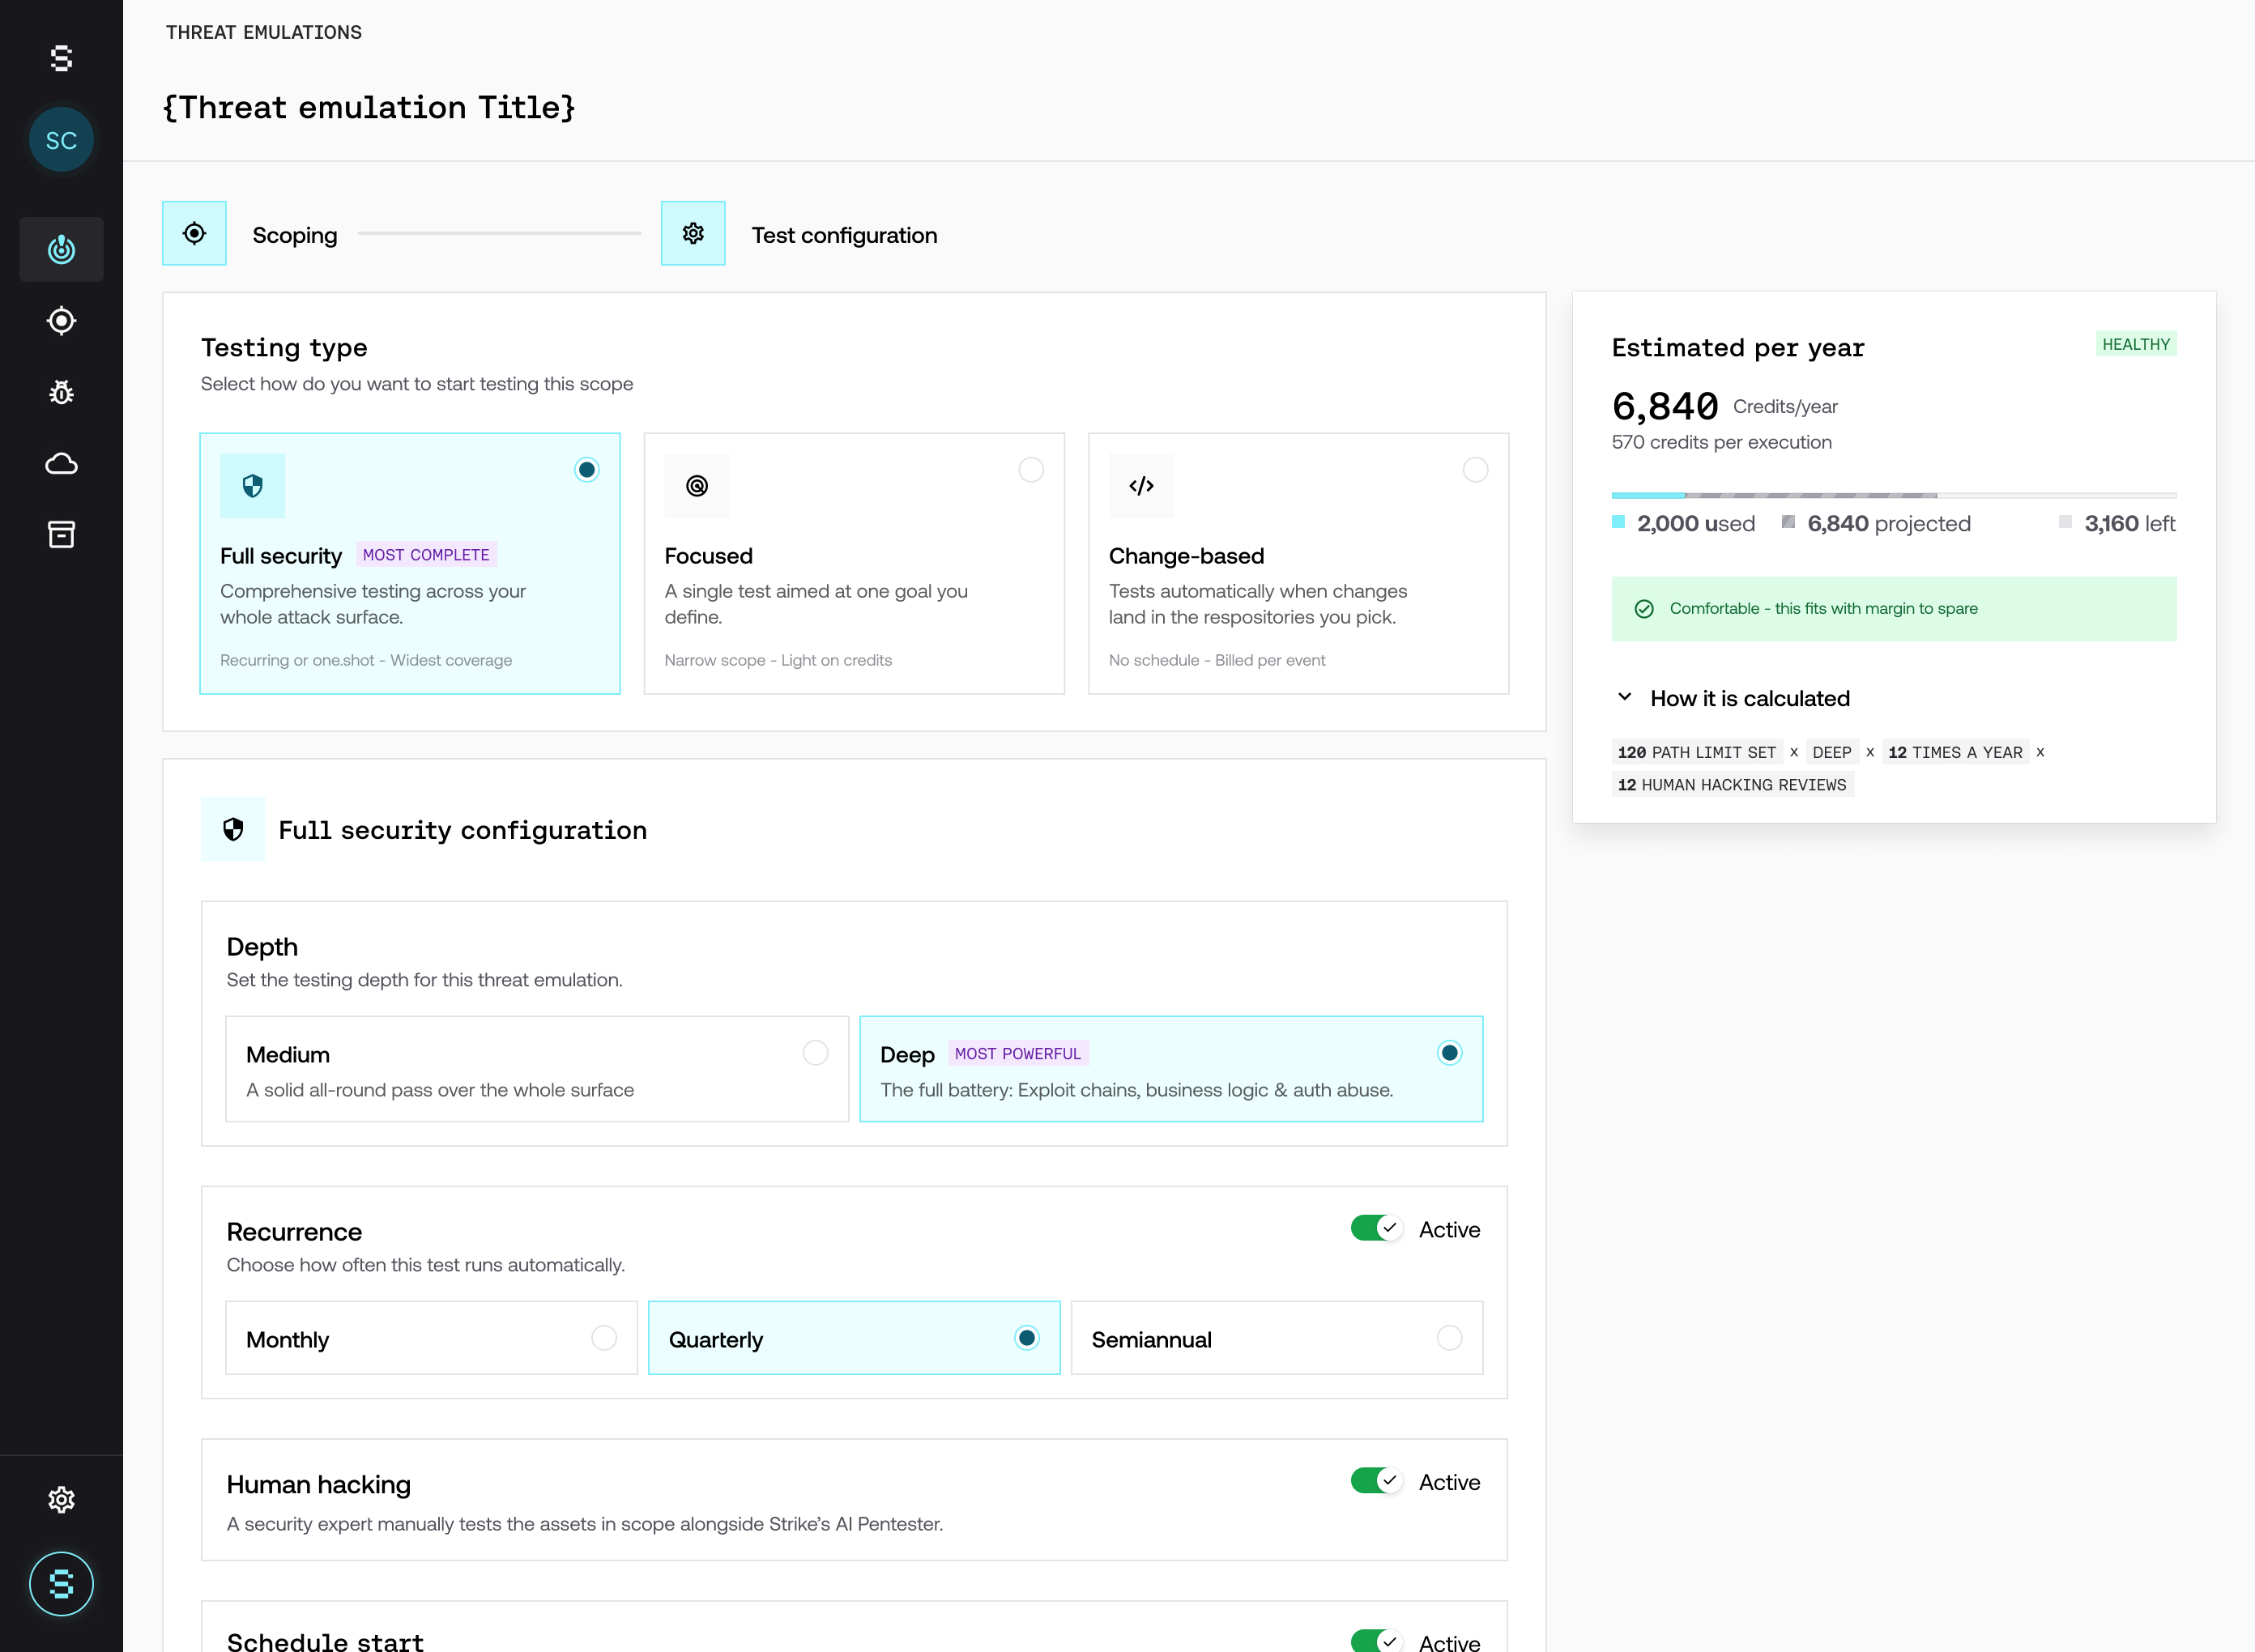
In the Test configuration step you choose the testing type and configure it.
Testing type | What it is for |
|---|---|
Full security | Complete testing of the entire surface in scope. It can be recurring or a single execution. |
Focused | A specific test on a target you define. |
Change-based | Runs automatically when there are changes in the repositories you choose. |
Full security
Depth: choose Medium (one complete pass over the entire surface) or Deep (includes exploitation chains, business logic, and authentication abuse).
Recurrence: turn it on so the test runs automatically every month, quarter, or half year (Monthly, Quarterly, or Semiannual). If you leave it off, it runs only once.
Human hacking: turn it on so that a security specialist manually tests the assets in scope, alongside Strike's AI agent.
Schedule start: turn it on to choose the start date and time of the testing. If you leave it off, testing starts when you confirm.
Additional information: optional. Tell us any important detail about how your scope works, for example critical flows, special behaviors, or authentication requirements. For more ideas, see What to include in the context.
Focused
Depth: same as in Full security.
Goal: describe the flow, functionality, or vulnerability area the test should focus on. For example: "Test the password recovery flow and session expiration handling".
Additional information: optional.
Change-based
Repositories: select the repositories to monitor. Changes in those repositories trigger a test, but they do not modify the scope. You need to have GitHub connected at the organization level; if it is not, click Connect GitHub.
Test trigger: choose Per pull request (runs when a pull request is merged into the main branch) or Per release (runs when a new release is published).
Additional information: optional.
For more detail, see How to configure Change-Based Testing.
Restrictions
In Full security and Focused you can define rules that apply to the entire Threat Emulation. They are optional:
Exclude tests: choose the intrusive test types you do not want to run, for example Denial of Service (DoS) & Stress Testing or Destructive Payloads.
Schedule restrictions: block time windows in which testing is not allowed. You can define one or more periods per day, or block the entire day, and choose the time zone.
Rate limit: define the maximum number of requests per minute that the testing can send.
Credit estimate
While you configure, the estimate card shows how many credits the Threat Emulation will consume and is recalculated with every change. In How it is calculated you can see the calculation detail.
The card also tells you whether the consumption fits within your plan:
Healthy: it fits with room to spare.
Low margin: it fits, but with little margin left.
Over budget: your credits are not enough for all the scheduled executions. Add credits or reduce the scope.
Configuring the Threat Emulation does not consume credits. Credits are consumed only when each execution starts.
Step 4: Review and confirm
Click Review & confirm (in Change-based, Confirm & enable).
Review the summary: scope, testing type, when it runs, and the estimated cost.
Click Confirm and run.
If a schedule restriction is active at that moment, the Threat Emulation waits until the next allowed window.
Frequently asked questions
Can I include assets that I already have in my inventory?
Yes. Click Browse inventory in the Scoping step. You can combine them with new assets in the same Threat Emulation.
What happens if my asset has more paths than the limit I defined?
Testing stops when it reaches the limit. The remaining paths are not tested in that execution.
Why can't I change the path limit of an asset?
Because the asset has no credentials configured. In blackbox mode the limit is fixed at 40. Configure credentials with Set up to be able to adjust it.
Can I run a Full security test only once?
Yes. Leave the Recurrence switch off.